Kitchen craft: give old knives & utensils a new lease of life

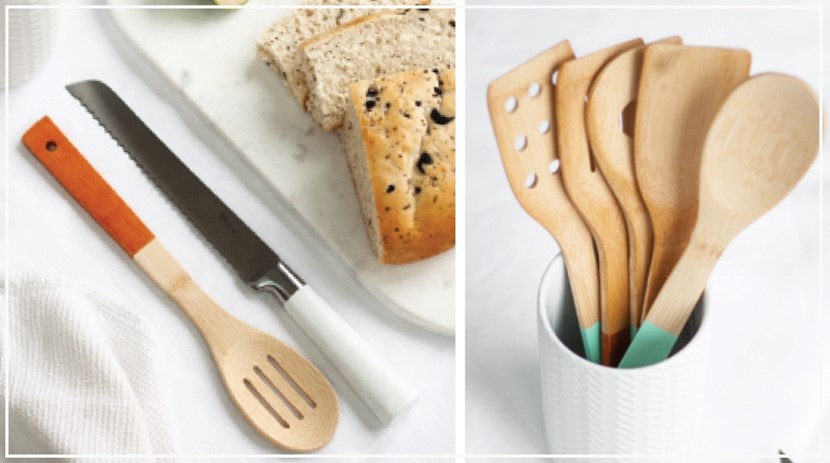
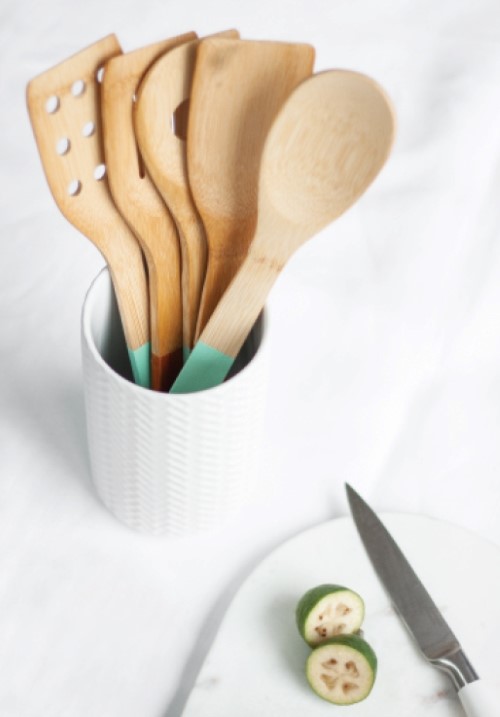
OHbaby! Art Director Jaimee Clapham sharpens up her act in the kitchen by giving old knives and utensils a new lease of life.
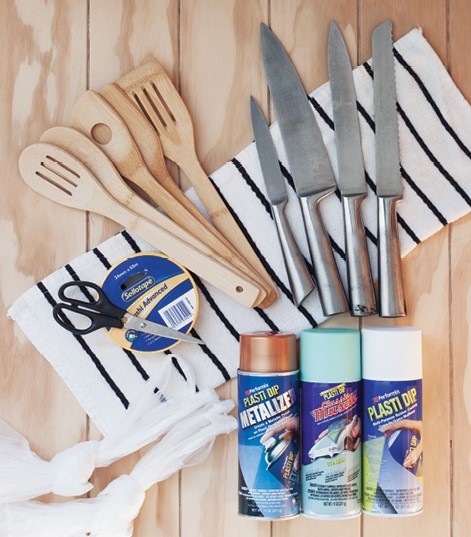
You will need:
◼️ Plasti Dip (visit griffithsequipment.co.nz for retailers)
◼️ Knives and/or kitchen utensils
◼️ Good quality masking tape
◼️ Scissors
◼️ Plastic bags
◼️ Drop cloth or sheet of cardboard
◼️ Disposable respirator mask (to wear when spraying the handles)
Method:
1. If your old knives still have a little bit of their original handle coating like ours did, then carefully clean it off with non-scratch steel wool.
2. Give your can of Plasti Dip a good shake – the instructions say up to a minute. Set aside for now so that air bubbles inside the substance can settle prior to spraying.
3. Use masking tape to define the edge where you would like the painted handle on your knives and utensils to begin by carefully wrapping the tape right the way around. Be careful not to overlap the end of the tape so that it goes over the clean straight line you’re trying to create. Press the tape down firmly.
4. To protect the remaining area of the knife or utensil from spray, place the non-handle end into a plastic bag. Bring the opening of the bag up to the masking tape that’s already in place on the handle, and use another strip of tape to secure the bag in place. Stick the tape about halfway down the piece already in place for the edge. You’re now ready to apply the first coat of Plasti Dip in your chosen colour. Plasti Dip is an air dry, synthetic rubber coating that can be easily applied by spraying, brushing or dipping. We chose spray cans in Copper Metalizer, 50s Aqua and White, but check out griffithsequipment.co.nz/plasti-dip-home for the full range of colours available.
5. Wearing a mask, apply the first coat of Plasti Dip. Refer to the instructions on the back of the can for advice on how to achieve an even finish. We used four coats on the bamboo utensils and five coats on the knives, so don’t worry if your first coat turns out a bit patchy. But do be careful not to over-spray, as the dip may run and ‘sag’.
6. Carefully remove the plastic bag and edging tape straight away while the dip is still wet. Since this product dries to a rubbery plastic finish, the masking tape would get trapped under the cured substance if left on until dry, and would possibly peel back the clean edge. Prop your knife or utensil somewhere it can dry without the handle touching a surface. We placed ours on the edge of a bench with newspaper below and placed weights on the non-painted ends to keep them from toppling off.
7. Repeat steps 3-6 to add additional coats (with 30 minutes drying time between each coat) until you get a finish you’re happy with. Remask the edge as closely as possible each time.
8. Now sharpen up those pretty knives and chop and stir in style!


AS FEATURED IN ISSUE 42 OF OHbaby! MAGAZINE. CHECK OUT OTHER ARTICLES IN THIS ISSUE BELOW


