Make Your Own Headboard - It's Easy!
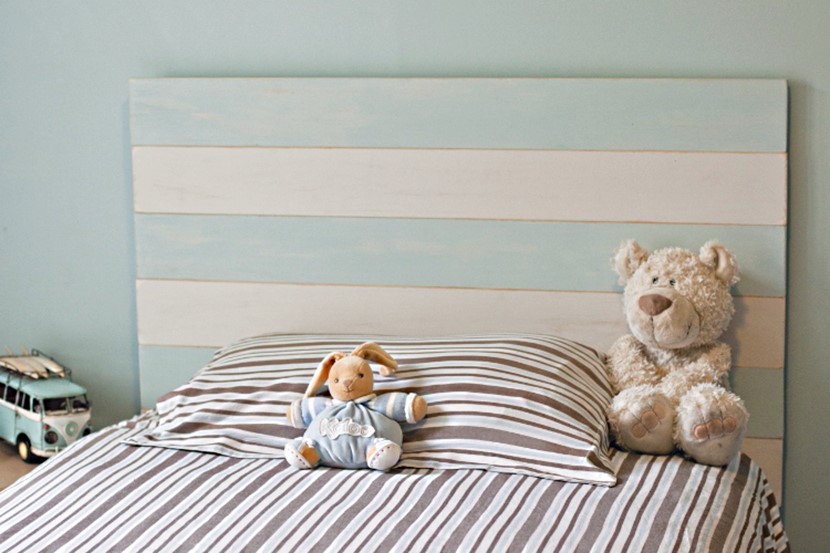
Add the finishing touch to your child’s bedroom with this simple head board designed to complement any colour scheme.
This project works for a bed base that already has screws and holes for attaching a head board.
You will need:
▫️ Six lengths of pine about 18mm thick by 115mm wide, cut to the width of your bed.
▫️ Two lengths of pine roughly 18mm thick by 65mm wide, cut to one metre long.
▫️ 12 self-taping 30mm screws
▫️ Sandpaper
▫️ Paintbrush
▫️ Electric drill
▫️ Resene Lustacryl semi-gloss enamel paint in your choice of colours. We used Resene Sea Fog and Resene Half Kumutoto.
Method:
1. Measure the width of the bed adding 20mm for each side. Our bed required 1100mm-long planks to lie horizontally. We had these pre-cut at the local hardware store, as well as the two narrower lengths of pine to run vertically behind the headboard as pillars, each one cut to one metre in length.
2. Sand your planks first to remove any sharp edges.
3. Paint your six horizontal planks in Resene Sea Fog on both sides.
4. Next, paint three of your planks in your alternative colour choice — we used Resene Half Kumutoto. Once dry apply another coat of colour. Paint another coat or two of Resene Sea Fog on your remaining three planks.
5. As an optional extra, once your final coat is dry, sand the planks lightly to give a distressed-look finish.
6. Carefully measure the length between the two existing holes on the bed base that will secure the head board. This is a very important measurement and will also be the distance between the two vertical pillars that will run down the back of the head board, securing all the planks together and then securing the head board to the base. We’ll call this the pillar spacing measurement.
7. Mark the centre point on each of the six horizontal planks. Next halve the pillar spacing measurement and mark that point on either side of the centre mark, measuring from the centre mark. It’s important that this mark sits in the middle of the supporting vertical pillars when you attach them, as the holes connecting the base to the board need to be in the centre of the pillars for strength.
8. To ensure accuracy, measure the width of the pillars and mark on the horizontal planks where the pillars’ edges should align.
9. Line up the six horizontal planks so they are ready to be attached to the supporting pillars. Place the supporting pillars on top of the planks in the clearly marked positions. Using a cordless drill, screw the pillars to each plank with self-taping screws, so that all the planks are secured to both pillars.
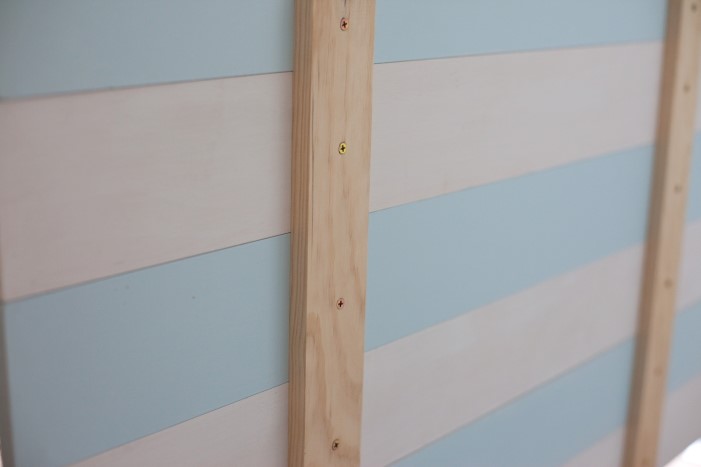
10. Place the head board against the bed so you can mark on the pillars where you want it attached. Mark where the bed base holes are so you know where to drill. For accuracy, measure the gap between the holes in your bed base, ensuring you are measuring from the centre of the holes so you achieve correct alignment.
11. For the final step, it’s a good idea to check the width of the screws that go into the bed base and use a drill piece slightly larger to ensure the screws fit. Then simply attach the head board to the bed base.
Colours we used:
 |
 |
||
|
|
Visit your local Resene ColorShop, phone 0800 RESENE (737 363) or :
| SHOP ONLINE HERE |

AS FEATURED IN ISSUE 25 OF OHbaby! MAGAZINE. CHECK OUT OTHER ARTICLES IN THIS ISSUE BELOW
