This nursery will make you want to curl up for a snooze
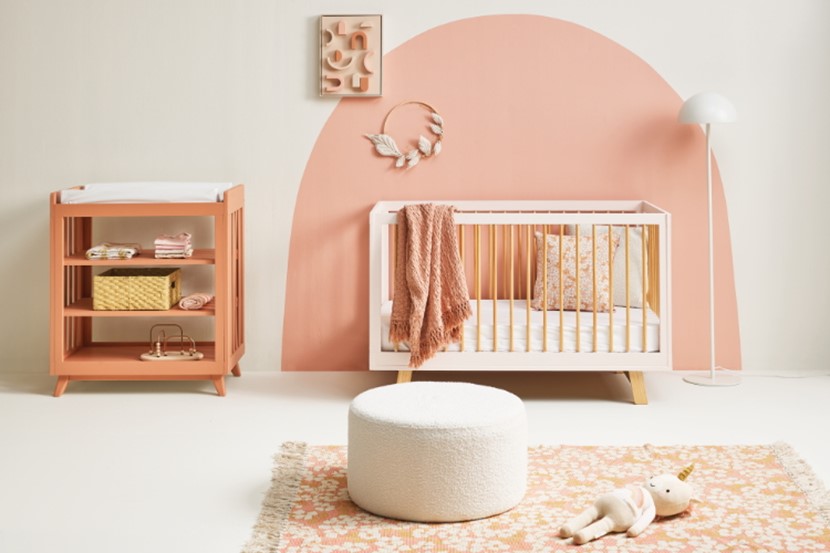
Embrace curves and peachy tones with this sweet and soothing nursery space.
When it comes to creating a nursery for your little one, consider picking a shape as a starting point and repeating it throughout the room.
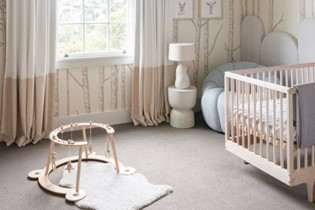
In this space we have taken the arch and circle shapes and repeated throughout with furniture, décor and paint design. Adding curves and circles in any space will add a softness to a room, rather ideal for a nursery in particular. From the ottoman, floor lamp, wall hanging and art works, chair, basket, side table, and the DIY wall shelf – you’ll notice all of these have some type of curve.
The hero of the room is of course the painted arch behind the cot. This is a simple yet effective way to add instant wow factor! We then layered a DIY piece of artwork which is made up of arches and also a cute fabric leaf circle wreath to the wall.
To keep the room from looking flat we have also introduced some floral pattern to the space in the form of a rug and cushion. These two pieces not only help tie the colour palette together but add some interest to the space.
The reading nook in the corner of the room is inviting and a great calm and relaxing spot to read to your little one. Rather than a big solid bookshelf we opted for an arch-shaped book display shelf. This shelf is made from ply wood and then painted in Resene Awaken to match the main arch over the bed.

DIY arch shelf in Resene Awaken. Round side table in Resene Inspire, rainbow vase on shelf in Resene Bone, stacking rainbow on shelf in Resene Awaken, Resene Inspire, Resene Cashmere and Resene Bone, vase on side table in Resene Twine, three wooden arches on floor in Resene Bone, and basket with toys in Resene Twine, all stylist's own, resene.co.nz/colorshops. Cobble Fabric Occasional Chair in alma white, $1,299, from freedomfurniture.co.nz; Belgian Linen Vintage Washed Linen Cushion (on chair), $89.99, from adairs.co.nz; Ombre Home Classic Chic Ava Floral Printed Rug, $50, from spotlightstores.com; Liewood Play Bead Maze in ronald rose (in basket), $96, Liewood Mr Bear Samson Night Light, $72, Patti Oslo Barbara Bunny Snuggle in yellow, $68.70, and books: Thank You, $30, Slow Down... On Your Doorstep, $16.99, Guess How Much I Love You – Golden Sweetheart Edition, $22.99 and Oh, Baby, The Places You'll Go, $14.99, all from littlewhimsy.co.nz.

Wall arch in Resene Awaken. DIY arch artwork in Resene Cashmere, Resene Santa Fe and Resene Awaken, resene.co.nz/colorshops. Other credits previously listed.

Three wooden arches on painted in Resene Bone. Other credits previously listed.

ARCH SHELF
To make our arched shelf we took a piece of 12 mm plywood and cut it 50 cm wide and 1.6 metres high. We then drew a curved edged at the top and using a jigsaw, cut off the excess wood. Before painting, give the curved end a light sand. The shelves are made from 12 mm plywood as well and are 50 cm in length and 15 cm deep. To attach the shelves we measured 28 cm off the bottom for the first shelf then 76 cm and 116 cm for the top shelf. We screwed in from the back into the shelves. We painted our shelf in Resene Awaken to match with the arch shape on the wall behind the cot. This is a great shelf to display books and décor pieces. (Remember to put fragile items up top so they can’t reach.) This shelf was then screwed to the wall.

ARCH PAINT DESIGN
To achieve this arched paint feature below, measure and mark with pencil 1.8 metres across the wall and 1.8 metres high. Using the pencil and string method, draw your arch on the wall. To get a smooth edge you can use Resene painter’s masking tape or if you have a steady hand you can always free hand the edges with your paint brush. We painted our arch in Resene Awaken. Make sure you give two good coats for the best finish.

DIY ARTWORK
To create this artwork we took an inexpensive box canvas frame and painted the canvas and frame in the same colour (Resene Cashmere). We then took some wooden kids' building blocks and painted them in Resene Cashmere, Resene Santa Fe and Resene Awaken. Lay out your blocks on top of the canvas and arrange in your desired design then using clear craft glue, glue the blocks to your canvas. Not only does this look like an expensive piece of art it is also fun to make and a quick project to whip up in a few hours.
Art direction + Styling: Vanessa Nouwens
Photography: Wendy Fenwick

AS FEATURED IN ISSUE 61 OF OHbaby! MAGAZINE. CHECK OUT OTHER ARTICLES IN THIS ISSUE BELOW
